Laundry day, a routine filled with the promise of fresh, clean clothes, can quickly turn into a damp ordeal when your trusty dryer refuses to do its job. The frustration of opening the dryer door to find clothes still wet is all too familiar.
In this comprehensive guide, we’ll not only troubleshoot the common issues but also take a unique approach, unraveling the nuances of dryer operation and offering practical solutions to revive your appliance. Let’s embark on a journey through lint traps, heating elements, and thermostats to reclaim the warmth in your laundry routine.
Understanding the Basics of Dryer Operation
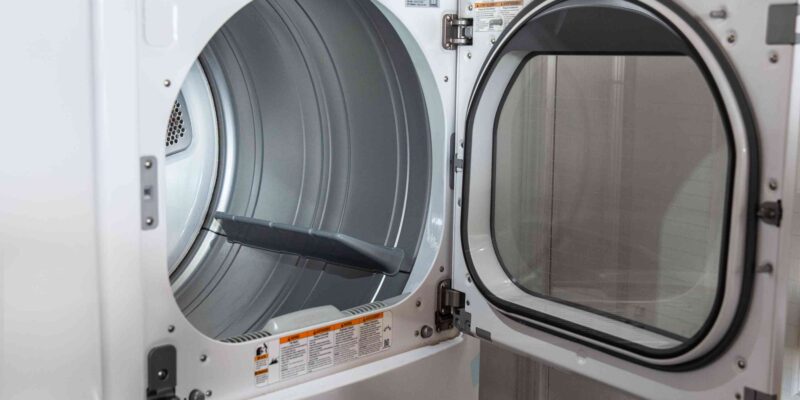
Before we dive into troubleshooting, let’s demystify how a dryer works. At its core, a typical dryer relies on a symphony of components: a heating element, thermostat, airflow system, and a lint trap. The heating element plays the role of the virtuoso, generating warmth to evaporate moisture. The thermostat ensures a harmonious temperature, and the airflow, akin to a gentle breeze, is crucial for efficient drying.
Common Reasons for a Dryer Not Drying
Heating Element
The heating element, our star performer, can sometimes falter, leaving your clothes cold and damp. Signs of trouble include extended drying times or, worse, no heat at all. To troubleshoot, a careful examination for visible damage is the opening act. If you spot issues, it’s time for a replacement to bring back the warmth to your laundry finale.
Thermostat
The thermostat, our temperature conductor, ensures the performance stays on key. When it falters, you might experience uneven drying or clothes coming out too hot. Testing for accuracy is the spotlight here, and if it fails to deliver a flawless performance, a replacement is the encore it deserves.
Airflow Obstruction
Imagine your dryer as a breath of fresh air for your clothes. Now, picture that airflow being obstructed, creating a dance of inefficiency. Check for obstacles in the venting system or around the dryer drum. A clear ventilation path is critical for an encore performance, ensuring your laundry routine dances to the right rhythm.
Lint Trap and Duct
A clogged lint trap or duct can lead to a waltz of inefficiency. The lint trap captures the fibers, but when neglected, it can impede airflow, reducing your dryer’s efficiency. Regularly cleaning the lint trap and inspecting the ducts for blockages is the choreography your appliance needs.
DIY Troubleshooting Steps
Checking and Replacing the Heating Element
To address heating element issues, prioritize safety by disconnecting the power. Inspect for visible damage and, if found, cue the replacement. Remember, safety first turns off the power before handling this electrical virtuoso.
Testing and Replacing the Thermostat
For thermostat drama, test for accuracy with a multimeter. A standing ovation for a job well done is expected, but if it falters, a replacement is the necessary encore. Again, safety is paramount, so disconnect the power before venturing into testing or replacement procedures.
Ensuring Proper Airflow
Inspect the venting system and clear away any obstructions. The exterior vent cap should be unblocked, allowing the hot, moist air to pirouette out freely. Proper airflow is the ballet of efficiency, so don’t underestimate the impact of a well-maintained ventilation system.
Cleaning the Lint Trap and Ducts
Regularly cleaning the lint trap is the solo every dryer should perform after each use. Periodically inspect and clean the ducts for a waltz of unobstructed airflow. This simple maintenance routine can significantly enhance your dryer’s performance and lifespan.
When to Seek Professional Assistance
While DIY troubleshooting can address many dryer issues, some problems may require professional intervention. If you encounter electrical or complex mechanical issues, or if your efforts don’t yield positive results, it’s time to call in the experts. Certified technicians have the knowledge and tools to diagnose and repair intricate problems, ensuring your dryer performs an encore at its best.
Preventive Maintenance Tips
Don’t wait for your dryer to throw in the towel proactive maintenance can extend its lifespan and keep it pirouetting smoothly. Schedule regular professional inspections to catch potential issues early. Additionally, adhere to a routine of cleaning lint traps, ducts, and venting systems to promote optimal airflow and prevent common problems.
Conclusion
In conclusion, a dryer not drying is a plot twist no one wants. By understanding the basics and implementing these unique troubleshooting tips, you can orchestrate a comeback for your appliance. Whether it’s checking the heating element, testing the thermostat, ensuring proper airflow, or maintaining a clear lint trap, these steps empower you to take control of your dryer’s performance.
Remember, safety is paramount during any DIY troubleshooting, and if in doubt, click here to hire the best-certified professionals who can handle complex issues and ensure your dryer is ready for the next laundry encore. Embrace warmth, efficiency, and a hassle-free laundry routine by giving your dryer the standing ovation it deserves.


Comments