
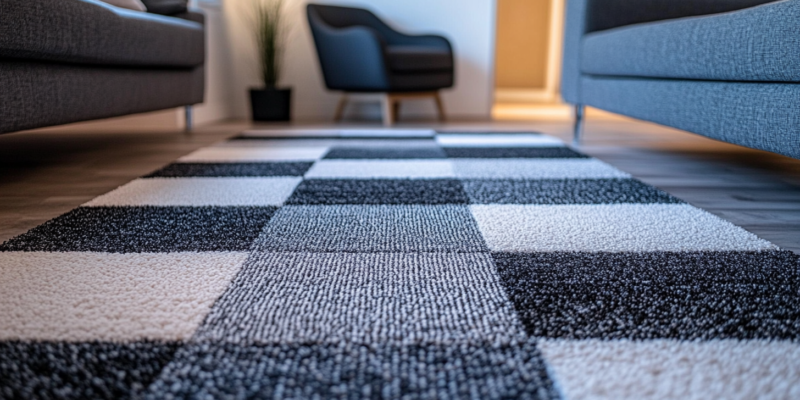
Adding carpet tiles makes any area come alive. Whether you’re modernising your living room or furnishing your home office, they provide a reasonably priced, fashionable, and versatile flooring solution.
Fortunately, you don’t need a professional to install them. If you have ever wondered how to install carpet tiles, we’ll tell you in seven easy steps.
Get Your Tools and Materials
Preparation helps you avoid mid-project panic. It’s better to gather the following tools and materials you need before you start working:
- Naturally, carpet tiles
- Measuring tapes
- Utility knife with sharp blades
- Chalk or marker
- Ruler or straight edge
- Adhesive for carpet tiles
- Floor roller
These instruments will help streamline your job and guarantee a seamless installation. Trust us. Nothing is worse than finding you’re lacking a sharp knife to cut those difficult corners halfway through!
Take Measurements
Though this isn’t the most interesting aspect of the procedure, proper measurements are vital.
Calculate the room’s precise dimensions with a measuring tape. Standard sizes for carpet tiles are typically 18×18 inches (45×45 cm), but you should confirm the tile size you bought.
Knowing the room’s total square footage or square metres guarantees that you purchase enough tiles, with a little extra for correcting mistakes or future replacements.
Once measured, note the room’s central point. Starting from the middle and going outward guarantees the tiles are equally distributed and produces a professional-looking finish. Nobody wants uneven edges.
Draw your central lines spanning the length and width of the room using chalk or a marker.
Prepare the Floor
Since nobody likes lumps or bumps under their new carpet tiles, floor preparation is crucial.
Start by carefully cleaning the floor. Brush away any dust, filth, or junk and, if needed, mop. Make sure any remaining adhesive from past flooring is either sanded down or removed. Remember, uneven surfaces will produce uneven tiles, most definitely not your desired effect.
Let the floor totally dry afterwards. This stage is particularly important if you’re indenting to apply glue to the tiles as it doesn’t mix well with moisture. Hence, dampness could cause the adhesive to fail.
If you use self-adhesive carpet tiles, their clean surface will guarantee correct adhesiveness and lifetime stability.
Lay Out the Tiles
Finally, the fun part. Make a dry run first by laying out the tiles to observe how they would look before stabilising them down. Lay the first tile where your lines cross from the middle of the room. Work outward from there, arranging the tiles in rows down the lines you have sketched.
As you layout, consider the tile direction. On the rear of many carpet tiles, arrows point towards the pile direction. Install all tiles going the same direction for a uniform appearance. You can also alternate the directions if you want a more chequerboard or artistic pattern.
This is where your style comes in. Discover which looks best for the appearance of your room.
Apply Adhesive
You can skip this step if you use self-adhesive carpet tiles.
Start by lifting one area of your dry-laid tiles and troweling the floor with carpet tile adhesive. Apply the glue evenly, covering a little area at a time to prevent it from drying up before placing the tiles.
Following the manufacturer’s directions, let the adhesive become sticky. Normally, this takes 10 to 15 minutes. Once done, start putting the tiles in the same sequence you used during the dry run.
Press down firmly to make sure every tile grips the floor firmly. Don’t hurry this stage, and slow down to prevent any gaps or bubbles between tiles.
Cut and Fit The Edge Tiles
You probably have to cut some tiles to fit as you approach the room’s edges. That utility knife and ruler will come in handy here.
Make the tile based on its place. As you cut, run your knife under the straight edge for direction. Cut on the back of the tile to stop fraying.
Start with a somewhat larger piece and trim as necessary to avoid ruining any tiles. Though you can always chop more off, adding it back is a little more difficult.
After the edge pieces are cut and fitted, lay them down in a way that exactly lines the rest of the tiles. Be as precise as you can as gaps around the walls can compromise the neat finish you’re hoping for.
If you find this step too difficult, you can always consult a professional carpet cleaner to help.
Secure and Finish
You are nearly done. Give the floor a last look once all the tiles have been laid, ensuring the alignment and sticking down is definite.
This is where you use your floor roller. Turning over the carpet tiles will guarantee they are firmly in place, and level any odd sections. If you don’t have one, walking over the tiles or manually pressing down on them will do the same effect.
Follow the manufacturer’s drying time guidelines before rearranging furniture into the space. You will have a brand-new floor to enjoy once everything has dried.
Conclusion About Installing Carpet Tiles
With some planning and effort, you can completely change the appearance and overall vibe of your room. Not only are carpet tiles simple to install, but they also require little maintenance.
Your newly fitted carpet tiles will give the room a fresh cosy vibe, whether it’s a living area, playroom, or home office.
Following our 7 easy steps, you’re perfectly equipped to renovate your home. You have the tools, the knowledge, and the processes. It’s now time to start.


Comments