Everybody loves the Tin can lanterns. The rustic charm, the beautiful appearance, and the affordable budget make the tin lighting loved by everyone. These lanterns provide warm lights to bring a beautiful ambiance to any special occasion.
So, the next thing that comes to our mind is how to make them so that they do not damage the environment?
Tin can lightings are affordable, budget-friendly, and can be powered using solar lights. Solar energy is the purest form of available energy and can be used in any electronic power gadgets.
In this guide, we will discuss how to make tin can solar lanterns to use them on any special occasion for warm lighting and beautiful ambiance and aura in our home.
Materials Required for Making Tin Can Solar Lights
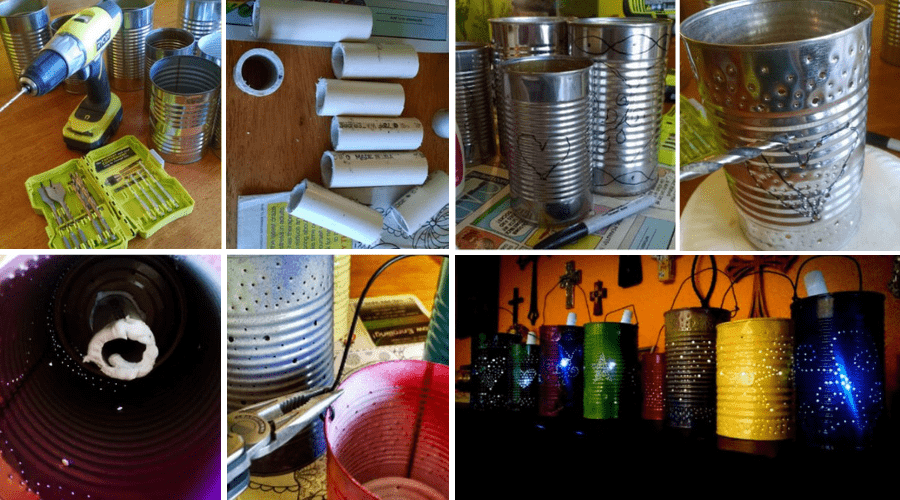
We will now discuss some essential materials and components that are essential for making tin can lighting lamps.
The materials that we require are recycled tin can, solar path light, cordless drill, galvanized steel wire, quick set epoxy adhesive, clear waterproof silicone caulk, pliers, black permanent marker, safety glasses, spray paint, or clear acrylic sealer.
These are the materials that we need to collect to make solar tin can lighting lamps so that they will not damage the environment in any way. The tin can lanterns look more beautiful and appreciated more.
However, candlelight is also preferred and looks auspicious, but a little change is necessary on every occasion.
Although everybody loves candlelight on every occasion, a tin can solar lighting lamp will be a beautiful change that you can make on special occasions.
Direction to make Tin Can Solar Lanterns
The first and foremost thing that we need to do in making tin can solar lanterns is to take a recycled tin can and tear off the original can’s label. This is because we do not want to advertise anything on our tin can, and we want to make them beautiful.
Now, you can design or do any creativity that you want to do on the tin can. Make sure to draw your designs using the black permanent marker only, like this.
You can make holes in the tin can also by using your power drill. Make sure to wear safety glasses while drilling, as it can directly affect your eyes if you do not wear them. Start drilling at a slow speed and slowly increase it. Once you are successful in making slight holes, you can pressure the drilling machine to break the holes through the can.
The iconic feature of using a drilling machine on the tin can be to make different types of holes on the same can, small and large ones, according to your choice. You can observe one thing while drilling that when making a large hole, the drill machine slips, so, if this is the case, you can choose first to make a small hole and then enlarge it.
Disassemble the solar light by twisting it in an anti-clockwise direction. In the center of the tin can, make a large hole so that an LED bulb can be accommodated within the tin can.
The next task is to make a handle for the tin can.
For this, you will be needed to make two holes on both sides. Make two small holes on opposite sides of the can, small enough to pass a steel wire through the holes. From the outside, insert the steel wire from one side to the other side of the tin can. This will be your handle of the tin can solar lantern.
The handle that you have just made by following this guide will be a U-shaped handle. You can now use spray paint and apply any color that you want on your tin can solar lantern. More so, if you do not want to apply any color, you can leave the tin can as it is, and slowly, it will gain a rustic appearance that will look more cool and beautiful.
The next thing that you will need to do is apply epoxy resin according to the directions given on the package. Apply only a thin layer of epoxy resin so that it can attract sunlight towards the can.
Now, on the top of the can, place the solar headlight to attract the sunlight on the tin can lantern. Press firmly to set the epoxy resin correctly. After the epoxy has been cured, you can apply a bead of clear and waterproof caulk around the solar headlight.
So, at last, your tin can solar lantern is ready. You can put it in the sunlight to charge the solar headlight. Finally, when you are done chagrining it for several hours, you can wait for the night to see the glamorous result after lighting it up.
Once the tin can solar lantern is made and charged, it will gloriously shine in the night like this. Also, in making a tin can solar lantern, there is no such task that you cannot do on your own. So, in this way, you can make your solar lantern in just a few hours without taking any external help. What you need to do is to follow the directions and guidelines that we have mentioned.
How to Paint Tin Cans?
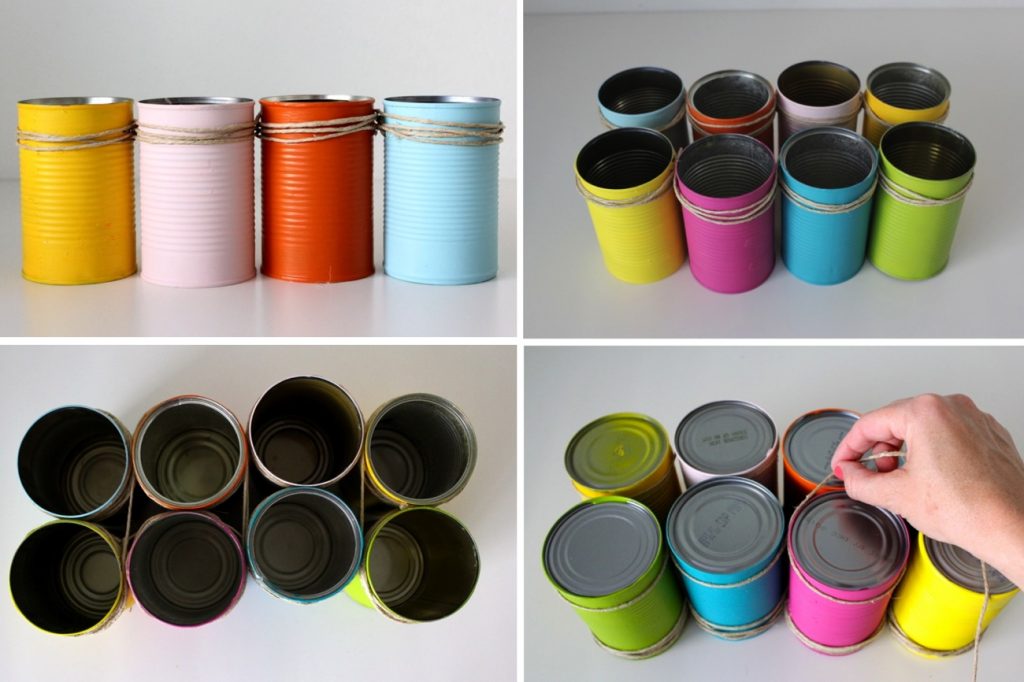
There are several ways in which you can paint your tin can. The easiest and the most beautiful way to paint a tin can is to use spray paint. Spray paint is readily available in the market. You can purchase it online on any shopping website according to your choice. Spray paints are available in various colors, and you can choose any one color according to your choice.
[amazon box=”B07LFYN3ND”]You can also paint your tin cans by mixing several colors. It will look more beautiful and authentic. Another thing that you can do with your tin can is to leave it as it is and wait for the rustic appearance that it will gain in time. The rustic charm that tin can gains is beautiful, attractive, and looks straightforward and gorgeous. However, it is totally up to you how you want to design your tin can solar lantern.
How to Make a Hole in a Tin Can?
If you want to make holes in the tin can, you will have to use a drilling machine for this purpose. We suggest a drilling machine because it can make holes of different sizes and shapes according to your need. You can also use a strong compass for this purpose, but somehow, it is not that reliable. Also, it is relatively risky to use a compass on a tin can. So, the better choice will be using a drilling machine.
How to Put lights Inside a Tin Can?
You can put fairy lights inside a tin can or can also put an LED bulb inside the can. You will have to put them inside from the opening side of the can. Remove the cover of the tin can you are using and place the fairy lights in a jig-jag manner inside the can. If you are using an LED bulb, then place it inside the can.
How to Decorate a Tin Can?
You can decorate a tin by using fairy lights inside the can and some decorative items or paint colors for the outside of the can. The easiest way to decorate the tin is to paint the can from the outside with a mix of colors. You can choose spray paints, acrylic paints, or any other type of paints you want to apply to the cans.
Inside the tin can, you can put some fairy lights of different colors to be a mix of lighting that will look more beautiful and encouraging after lighting it up. If you are using an LED bulb, you can use fairy lights with them also. There is no need to worry about the bulb and lights’ power as we will light them up with solar power.
In the end
In this article, we discussed various facts about tin cans and how to make a tin can solar lantern. We have found out various unique things that we can use to make our tin solar lantern beautiful and attractive.
The most important thing about making a tin can lantern is that we are using the purest form of energy that will not damage the environment, and it is also relatively cheaper.
To make a tin can solar lantern, all you need is to collect the components and decorative items that we have discussed and follow the guidelines that we have mentioned.
In this way, you will make a tin can solar lantern in few hours without facing any significant issues.












Comments